
Here’s a super simple edge treatment using the blind hem stitch on your machine. It works best on light drapey fabrics. Be sure to experiment on a scrap of fabric first to get your settings right.
I used this treatment on a strip of cloth to trim a neckline, but you could also use is as an edge finish directly on a neckline or front edge. Just remember it’s rather fragile, so don’t use it on a edge that’s going to be tugged and pulled on.
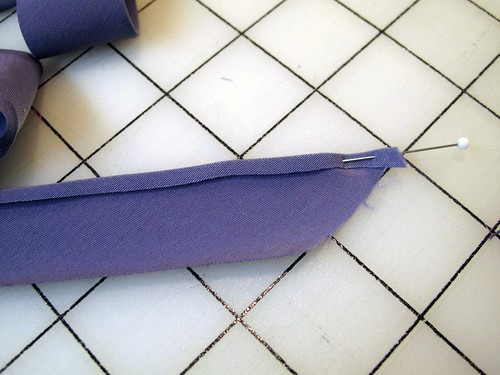
I started with a bias strip 1.25” wide. I didn’t need that much finished width, but that width gave my fingers enough fabric to hold on to it while ironing. Cutting on the bias helps reduce fraying.
Fold the fabric toward the wrong side 1/8” and press. For this polyester peachskin fabric, the effect worked best if I only turned the fabric to the wrong side once. With more sheer fabrics, it might work to turn the fabric twice so there’s no raw edge exposed, even though the edge gets encased in the zig-zag stitching. Experiment.
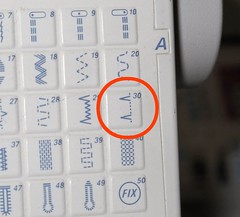 |
| A blind hem stitch looks like this. |
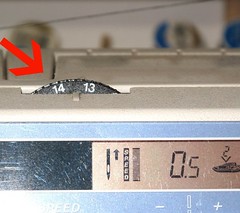 |
| My upper thread tension wheel. |
Set your machine for a blind hem stitch and increase your thread tension as high as it will go. Consult your manual if needed. Increasing the thread tension causes the top thread to pull in the fabric when it zig-zags out to the fabric edge, creating the scallop.

Align the folded edge of the fabric under the pressure foot, right side up, so the zig-zag stitch moves just beyond the fabric edge. Adjust the stitch length and width until you like the look. I used .5 mm length and 4 mm width. Go slow, and use your fingers to guide the fabric.
 |
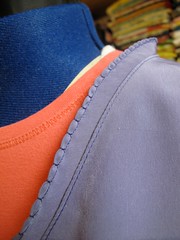
| Here's the trim applied to the neck edge. |
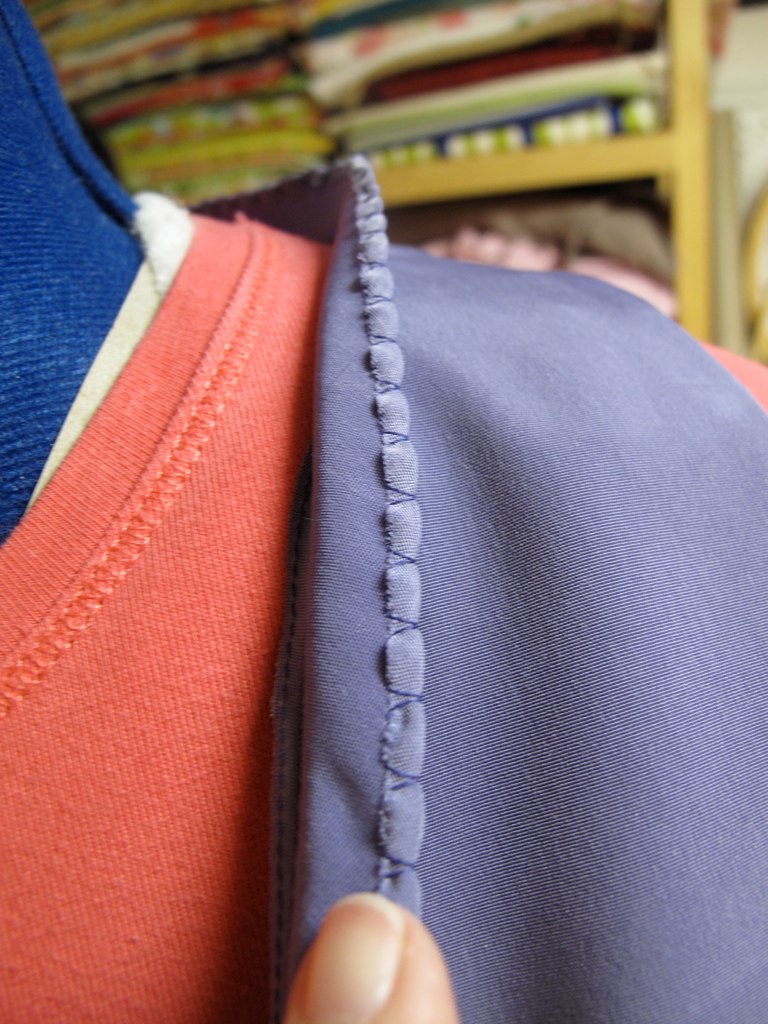 |
| Here's the back side of the finished trim. Notice the raw edge encased by the stitching. |


No comments:
Post a Comment